That's right, I finally got Under Pressure and it is just as lovely as I had imagined. The recipes look daunting and complicated so I got that going for me.
The downside is that I am going to be out of the country for 2 weeks starting Sunday and I have lots of work to do between now and then. None the less I will try my best to get one recipe under my belt before I leave, we will see how it goes.
Exciting.
Tuesday, October 28, 2008

Monday, October 13, 2008
Pheasant, shallot, cider, burning oak leaves.
While I have been waiting (impatiently) for my copy of Under Pressure I decided to kill some time by practicing on a nice and easy recipe from the Alinea cookbook.
Of course it had to involve sous vide in some way, and the cookbook is helpfully arranged into seasons so I just thumbed through the Autumn section until I got to this one:
 photo credit: Alinea, http://www.alineamosaic.com
This is Pheasant, Shallot, Cider, and Burning Oak Leaves.
I debated whether or not to include the photo for a couple reasons.
The first is that it I am sure that it is copyrighted and I don't know how the folks over there feel about that. I ended up taking a screen grab (and hosting it myself, hot linking is bad mmmkay) from the Aroma section of the Mosaic Website and gave credit to them; also clicking on the image brings you to the appropriate page. If someone in the know has an issue just let me know and I will remove it ASAP.
The second is that it sets high expectations but sometimes its important to be brutally honest. I think overall I was happy with how this worked out so its not really a problem, I will try to include comparison shots in this blog where possible.
So as for this recipe: it looked relatively straightforward and did not have an intimidating amount of components which is more then I can say for the majority of dishes in this tome so I decided to start with this.
The first component was what I thought would be the easiest one, roasted shallots. I grabbed some shallots from the supermarket and I have to admit that I am ignorant as to the varieties of shallots and just hope that the shallots I grabbed are the gray shallots prescribed in the recipe. Their skins are gray so I hope that is the case.
Another thing I was not sure of was when they said "shallots" do they mean both offsets in those shallots that are more then just one? I assumed it was a matter of one root = one shallot regardless of offsets.
Then I tossed them with some grapeseed oil. This oil was a nice shade of green, something I was previously unaware of:

Yeah, no clue grapeseed oil was green. I told you I wasn't an experienced cook and that was no lie.
So I tossed them in the oil and added some kosher salt and they ended up looking like this:

I know pretttttttty exciting right? Thrilling. These got roasted for an hour but to be honest it seemed like they were too soft and I had issues assembling the skewers in the end. The looked like this, after I cut them in half, it was a bit too difficult to try and cube these up neatly:
 I covered those bad boys up with some plastic wrap and stashed them in the fridge for the final assembling.
Next it was on to the Cider Gel. Here is my Mise En Place for this minus some kosher salt, I'm learning people, bear with me.
 That thing standing up is agar-agar, you will note that it is all in Japanese and I speak no Japanese but the clerk pointed it out so I was probably good to go but wanted to make sure.
I had no way to verify this as it appeared this package was entirely in Japanese. Luckily the back had the ingredients list, in English on a sticker, which included agar-agar (I love saying this) and called it Kanten which I recalled from a little wikipedia love as the Japanese word for agar-agar, they also called "seaweed powdered stick" but I digress.
Anyway that, some apples, some cider from the farmers market,
 salt and agar-agar into a sauce pan and heated this till simmering and the agar was dissolved and the apples were soft.
 These ended up smelling delicious and it tasted pretty delicious as well.
I poured this into a loaf pan lined with plastic wrap, it turned out that the loaf pan was slightly too large but not by much so it turned out pretty well.
 Once this set I cut it up into cubes:
 Yeah I use calipers in my kitchen, yeah I am a dork :(
I then put these on a small plate and covered them with a moist paper towel and put these in the fridge as well.
I will say two things.
First, these were a lot softer then I anticipated but I followed the recipe exactly so it must just be the way it is.
And two, granny smith apples are not to be trifled with, those bad boys did this to my crappy vegetable peeler:

woops.
Alright so that was super exciting right? Yeah, totally.
Now it's on to the really fun part, the pheasant. I picked this bad boy up on the internets. I got the fresh and non-wild variety stupidly thinking that fresh farmed beats frozen wild, it basically tasted like chicken, albeit 15USD$/lb chicken (shipped), so I am not assuming this is not the case, lesson learned.
First things first I have never disassembled a raw bird (yes I am a novice).
Luckily Mike Pardus just posted a great video over at A Hunger Artist which is a sweet blog I found from Michael Ruhlman's blog who of course helped write The French Laundry Cookbook which is really the reason (along with the TFL at Home Blog of course) that I started this blog, so we come full circle.
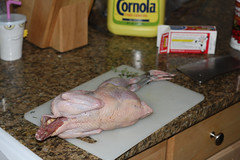
Anyway by following that video, I was able turn this:
 Into this:
 Counter clockwise from the top left that is: Drumsticks, boneless thigh meat, disassembled wings breast halves, one with skin, two chicken "tender loins" and the heart.
This was after I totally disassembled the bird using Pardus' method and put the carcass and bone into a stock pot and the skin and fat into a rendering pot. So these are all trimmed, I only left the skin on one breast half because I only needed one for the recipe
(that calls for a breast w/ skin, duh) and I'm trying to maintain my girlish figure.
Here is a gratuitous stock shot:
 I cooked it about 3 hours so it was really some bastard susbtance midway between jus and stock, according to my friend Jacob anyway.
I was pretty darn proud of my leet skillz but some things worked out better then others. As evidenced below:

The one on the left looks awesome and the one on the right looks pathetic. Overall however this was easier then I imagined and will definitely be buying whole chickens to carve up. Thanks to my awesome food saver I can buy a bunch of chickens, break them down, season and bag them and it makes for a really quick and easy meal. Plus I can make a lot of stock at once and I save the rendered fat for various cooking uses, mostly because I like saying I render my own chicken fat.
When you render this you get:

On the left you have pheasant cracklings and on the right, in a lovely sake glass I got in Tokyo, liquid chicken fat (actually got two glasses worth from this one bird). I made this yesterday and used some of the fat and the cracklings in an omelet I made for dinner tonight and they tasted delicious.
When I first made it I called it pheasant bacon and fed it to my ravenous roommates who seemed to enjoy it. Oh, also after the water all evaporated and I was left with just fat in the rendering pot I dropped the heart in and ate it for a delicious mid prep snack.
Anyway, I packaged up the breasts with the herbs and some butter (way more butter then I would normally use when cooking a bird but then again there is a reason my name isn't synonymous with "awesome chef"). I also got nervous at this point and thought that "pheasant breast" may mean "both halves" so I threw in both along with the tenderloins which mostly separated on their own.

It looks delicious doesn't it? And here is the end result:

Yeah lots of butter. The good news, health wise anyway, is that most of that butter stays in the bag and not in and on the pheasant.
The extra pieces I tossed in another bag with salt, pepper and butter:
 Which when combined with some left over Butternut Squash, Spinach and Blue Cheese Risotto and a quick mustard sauce become this dinner:
 It doesn't look very delicious but trust me it was absolutely delicious and I will probably make this again soon.
So now it was time to put it all together. First I had to pare down the oak leaves and ended up with this:
 I don't think having to whittle down oak branches was one of those things I anticipated when I started this project but I am sure there will be lots more I never thought of.
One thing the astute reader will notice is that my leaves are a lovely green and the recipe clearly indicates they should be a lovely orange hue befitting the season. Unfortunately NYC leaves have not yet begun to turn so I was stuck with this.
I actually originally gathered (poached?) some leaves from Central Park and even got a couple of friends to bring them to me after I left them in the UWS before a night of partying, I then met them for lunch at Black Iron Burger and promptly left the leaves there. Luckily there was an oak tree I never noticed right outside my apartment so it all worked out.
The net result of this whittling were Oak branch skewers which were quite lovely and very difficult to work with:
 I heated up some oil and started making the tempura batter, after carefully weighing all my ingredients I ended up with this:

Not quite the light and airy tempura batter I was hoping for. I added a lot more seltzer water and ended up with what I thought was a passable batter. However the final product looked a bit more "corn dog" then "Alinea"

In the end though they tasted absolutely delicious. The cider gels liquefies when you fry it and when you bite in the pheasant, shallot and cider all meld together to become something truly special, more then the sum of its parts without a doubt.

The darker leaves are ones that ended up in the frying oil and I didn't salt or pepper these yet as is called for in the book, the burning leaves definitely had a desired effect. I found THAT out when my roommate stumbled in yelling that it "smells like a goddamn forest in here" so that was pretty sweet.
Overall the end result looks very amateurish but I was very happy with the taste. The gel is a really awesome touch. If I were to make this again in the future I would probably do some work on getting the tempura batter just right as well making a proper sized dish for the cider gel to set up in because they were a bit thinner then called for.
Additionally I would try roasting the shallots for slightly less time because they had a bad habit of falling off the skewer when dipped in the batter (but that could also be a result of my less then airy batter).
I didn't invest in squid service pieces because this was just a filler recipe and I didn't think it was necessary to enjoy the final product. They are pretty neat though and may be cool to pick up and play around with in the future.
All in all this recipe definitely increased my resolve to snag a reservation at Alinea next time I am in town, which is hopefully soon.
Anyway my next post may be a Meet the Tech post or more likely will be the very first recipe from Under Pressure! I am very excited to really get this project underway and this first recipe was pleasantly challenging and I can't wait to try more new things.
Of course it had to involve sous vide in some way, and the cookbook is helpfully arranged into seasons so I just thumbed through the Autumn section until I got to this one:
 photo credit: Alinea, http://www.alineamosaic.com
I debated whether or not to include the photo for a couple reasons.
The first is that it I am sure that it is copyrighted and I don't know how the folks over there feel about that. I ended up taking a screen grab (and hosting it myself, hot linking is bad mmmkay) from the Aroma section of the Mosaic Website and gave credit to them; also clicking on the image brings you to the appropriate page. If someone in the know has an issue just let me know and I will remove it ASAP.
The second is that it sets high expectations but sometimes its important to be brutally honest. I think overall I was happy with how this worked out so its not really a problem, I will try to include comparison shots in this blog where possible.
So as for this recipe: it looked relatively straightforward and did not have an intimidating amount of components which is more then I can say for the majority of dishes in this tome so I decided to start with this.
The first component was what I thought would be the easiest one, roasted shallots. I grabbed some shallots from the supermarket and I have to admit that I am ignorant as to the varieties of shallots and just hope that the shallots I grabbed are the gray shallots prescribed in the recipe. Their skins are gray so I hope that is the case.
Another thing I was not sure of was when they said "shallots" do they mean both offsets in those shallots that are more then just one? I assumed it was a matter of one root = one shallot regardless of offsets.
Then I tossed them with some grapeseed oil. This oil was a nice shade of green, something I was previously unaware of:
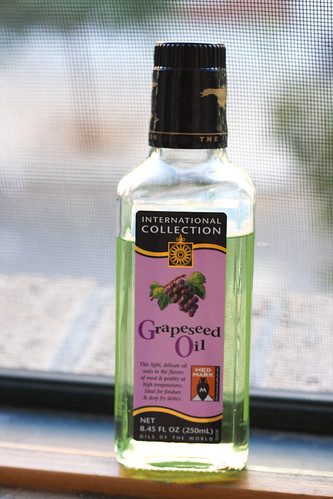
Yeah, no clue grapeseed oil was green. I told you I wasn't an experienced cook and that was no lie.
So I tossed them in the oil and added some kosher salt and they ended up looking like this:
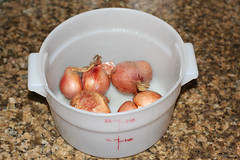
I know pretttttttty exciting right? Thrilling. These got roasted for an hour but to be honest it seemed like they were too soft and I had issues assembling the skewers in the end. The looked like this, after I cut them in half, it was a bit too difficult to try and cube these up neatly:
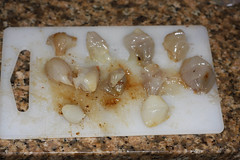 I covered those bad boys up with some plastic wrap and stashed them in the fridge for the final assembling.
Next it was on to the Cider Gel. Here is my Mise En Place for this minus some kosher salt, I'm learning people, bear with me.
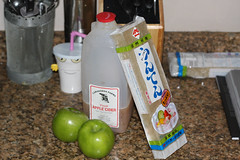 That thing standing up is agar-agar, you will note that it is all in Japanese and I speak no Japanese but the clerk pointed it out so I was probably good to go but wanted to make sure.
I had no way to verify this as it appeared this package was entirely in Japanese. Luckily the back had the ingredients list, in English on a sticker, which included agar-agar (I love saying this) and called it Kanten which I recalled from a little wikipedia love as the Japanese word for agar-agar, they also called "seaweed powdered stick" but I digress.
Anyway that, some apples, some cider from the farmers market,
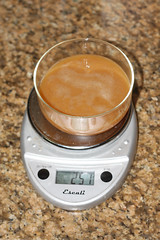 salt and agar-agar into a sauce pan and heated this till simmering and the agar was dissolved and the apples were soft.
 These ended up smelling delicious and it tasted pretty delicious as well.
I poured this into a loaf pan lined with plastic wrap, it turned out that the loaf pan was slightly too large but not by much so it turned out pretty well.
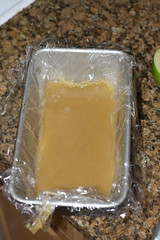 Once this set I cut it up into cubes:
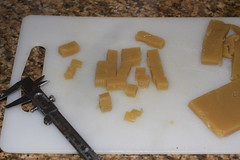 Yeah I use calipers in my kitchen, yeah I am a dork :(
I then put these on a small plate and covered them with a moist paper towel and put these in the fridge as well.
I will say two things.
First, these were a lot softer then I anticipated but I followed the recipe exactly so it must just be the way it is.
And two, granny smith apples are not to be trifled with, those bad boys did this to my crappy vegetable peeler:
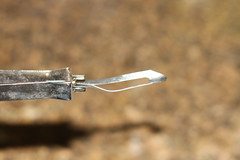
woops.
Alright so that was super exciting right? Yeah, totally.
Now it's on to the really fun part, the pheasant. I picked this bad boy up on the internets. I got the fresh and non-wild variety stupidly thinking that fresh farmed beats frozen wild, it basically tasted like chicken, albeit 15USD$/lb chicken (shipped), so I am not assuming this is not the case, lesson learned.
First things first I have never disassembled a raw bird (yes I am a novice).
Luckily Mike Pardus just posted a great video over at A Hunger Artist which is a sweet blog I found from Michael Ruhlman's blog who of course helped write The French Laundry Cookbook which is really the reason (along with the TFL at Home Blog of course) that I started this blog, so we come full circle.
Anyway by following that video, I was able turn this:
 Into this:
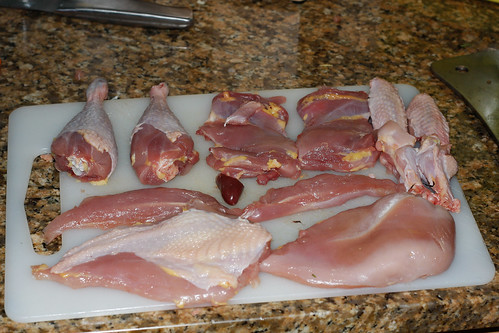 Counter clockwise from the top left that is: Drumsticks, boneless thigh meat, disassembled wings breast halves, one with skin, two chicken "tender loins" and the heart.
This was after I totally disassembled the bird using Pardus' method and put the carcass and bone into a stock pot and the skin and fat into a rendering pot. So these are all trimmed, I only left the skin on one breast half because I only needed one for the recipe
(that calls for a breast w/ skin, duh) and I'm trying to maintain my girlish figure.
Here is a gratuitous stock shot:
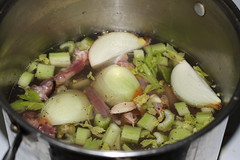 I cooked it about 3 hours so it was really some bastard susbtance midway between jus and stock, according to my friend Jacob anyway.
I was pretty darn proud of my leet skillz but some things worked out better then others. As evidenced below:
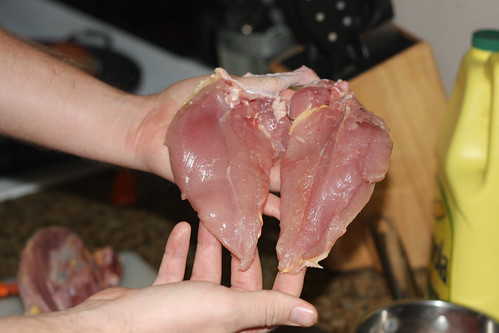
The one on the left looks awesome and the one on the right looks pathetic. Overall however this was easier then I imagined and will definitely be buying whole chickens to carve up. Thanks to my awesome food saver I can buy a bunch of chickens, break them down, season and bag them and it makes for a really quick and easy meal. Plus I can make a lot of stock at once and I save the rendered fat for various cooking uses, mostly because I like saying I render my own chicken fat.
When you render this you get:
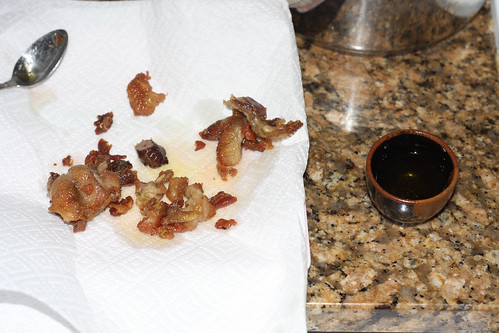
On the left you have pheasant cracklings and on the right, in a lovely sake glass I got in Tokyo, liquid chicken fat (actually got two glasses worth from this one bird). I made this yesterday and used some of the fat and the cracklings in an omelet I made for dinner tonight and they tasted delicious.
When I first made it I called it pheasant bacon and fed it to my ravenous roommates who seemed to enjoy it. Oh, also after the water all evaporated and I was left with just fat in the rendering pot I dropped the heart in and ate it for a delicious mid prep snack.
Anyway, I packaged up the breasts with the herbs and some butter (way more butter then I would normally use when cooking a bird but then again there is a reason my name isn't synonymous with "awesome chef"). I also got nervous at this point and thought that "pheasant breast" may mean "both halves" so I threw in both along with the tenderloins which mostly separated on their own.

It looks delicious doesn't it? And here is the end result:

Yeah lots of butter. The good news, health wise anyway, is that most of that butter stays in the bag and not in and on the pheasant.
The extra pieces I tossed in another bag with salt, pepper and butter:
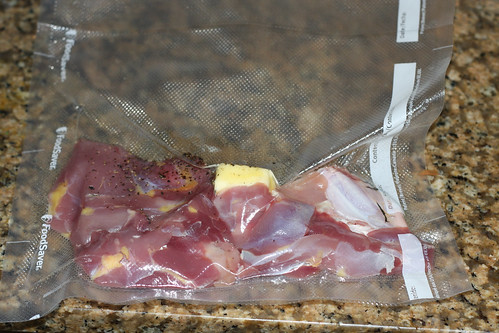 Which when combined with some left over Butternut Squash, Spinach and Blue Cheese Risotto and a quick mustard sauce become this dinner:
 It doesn't look very delicious but trust me it was absolutely delicious and I will probably make this again soon.
So now it was time to put it all together. First I had to pare down the oak leaves and ended up with this:
 I don't think having to whittle down oak branches was one of those things I anticipated when I started this project but I am sure there will be lots more I never thought of.
One thing the astute reader will notice is that my leaves are a lovely green and the recipe clearly indicates they should be a lovely orange hue befitting the season. Unfortunately NYC leaves have not yet begun to turn so I was stuck with this.
I actually originally gathered (poached?) some leaves from Central Park and even got a couple of friends to bring them to me after I left them in the UWS before a night of partying, I then met them for lunch at Black Iron Burger and promptly left the leaves there. Luckily there was an oak tree I never noticed right outside my apartment so it all worked out.
The net result of this whittling were Oak branch skewers which were quite lovely and very difficult to work with:
 I heated up some oil and started making the tempura batter, after carefully weighing all my ingredients I ended up with this:
Not quite the light and airy tempura batter I was hoping for. I added a lot more seltzer water and ended up with what I thought was a passable batter. However the final product looked a bit more "corn dog" then "Alinea"
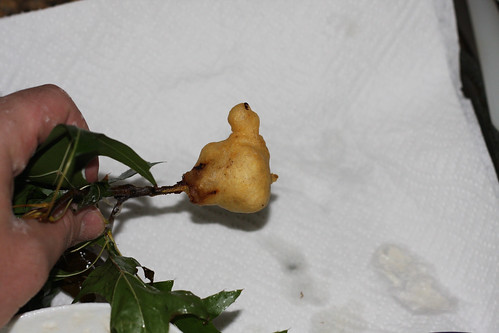
In the end though they tasted absolutely delicious. The cider gels liquefies when you fry it and when you bite in the pheasant, shallot and cider all meld together to become something truly special, more then the sum of its parts without a doubt.
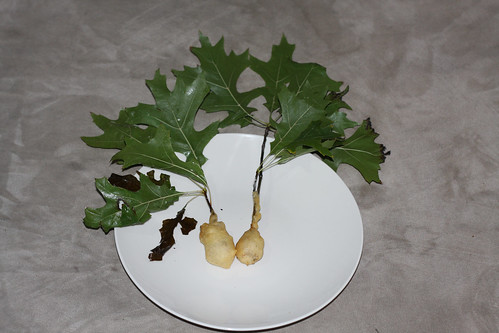
The darker leaves are ones that ended up in the frying oil and I didn't salt or pepper these yet as is called for in the book, the burning leaves definitely had a desired effect. I found THAT out when my roommate stumbled in yelling that it "smells like a goddamn forest in here" so that was pretty sweet.
Overall the end result looks very amateurish but I was very happy with the taste. The gel is a really awesome touch. If I were to make this again in the future I would probably do some work on getting the tempura batter just right as well making a proper sized dish for the cider gel to set up in because they were a bit thinner then called for.
Additionally I would try roasting the shallots for slightly less time because they had a bad habit of falling off the skewer when dipped in the batter (but that could also be a result of my less then airy batter).
I didn't invest in squid service pieces because this was just a filler recipe and I didn't think it was necessary to enjoy the final product. They are pretty neat though and may be cool to pick up and play around with in the future.
All in all this recipe definitely increased my resolve to snag a reservation at Alinea next time I am in town, which is hopefully soon.
Anyway my next post may be a Meet the Tech post or more likely will be the very first recipe from Under Pressure! I am very excited to really get this project underway and this first recipe was pleasantly challenging and I can't wait to try more new things.
Monday, September 29, 2008
You Paid 50 Dollars for a book?!
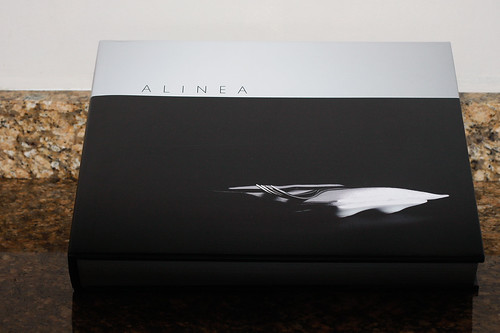
Yeah, I got classy roommates.
He was joking, I think.
But, no I only paid $34.14 from Amazon and it's basically awesome.
I plan on doing one of these recipes while I wait for Under Pressure. We will see how it goes.
In other news I did a little maintenance and fixed some images that were loading very large images and scaling them down. Now they are only slightly larger and should load much faster. Yes I could make them exactly the same size as they are displayed at and save your precious bandwidth but its not thaaaaaat much more and I am terribly lazy and want to use my Flickr account to store them and save MY precious bandwidth.
On a side note my previous post saw me wishing that the salmon I got was in fact wild. Well it turns out that it IS wild but it may not really be salmon (at least according to this post).
Additionally, according to my friend Jacob those potatoes are in fact Yukon Gold and not Russet as I had thought.
Oh, before I forget; here is a picture of my assistant, Master Shake, posing with the book:
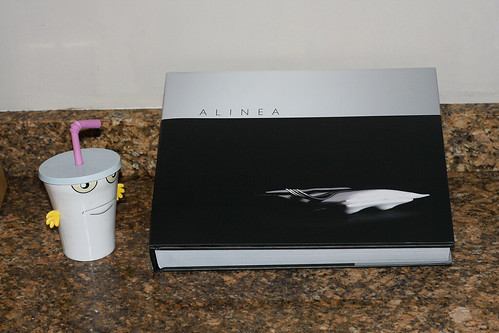
Update: The book is excellent, read through the essays and skimmed most of the recipes. Unfortunately the website does not let you enter in the serial number or whatever they are doing for registration yet, they are probably waiting for the 15th, too bad.
Fun fact though, the website stores your password in plain text and not a salted hash (not as in sea) , a clear violation of industry best practices ;), tsk tsk.
Sunday, September 21, 2008
Vanilla/Pepper Mi Cuit Salmon
Still waiting for the book of course so I have decided to keep myself busy with various other recipes. One thing I have been dying to try is salmon mi cuit (half/semi cooked). This is salmon which is cooked in 104F oil. Nathan M offers a recipe in the WSL Article that I thought would do the trick.
So I decided to copy that but cook it sous vide by taking hints from Nathan and Douglas.
I headed over to Whole Foods for the salmon as well as the vanilla beans and herbs. I got two fillets of coho salmon from WF, not sure if they were wild or not but it was the most expensive at ~$16/lb so lets pretend it was. mmmm kay? In any case the fish looked delicious for a Sunday night with no smell and, I later found out, fresh taste. Iwould did eat it raw and it tasted delicious.
A fun fact to mention is that salmon has all sorts of parasites and germs that you may want to kill via freezing for 24 hours. That being said I usually eat it raw and do not pay much attention to the food safety aspect. If you are making this for immune compromised people, you probably should. More information can be read on Douglas' site.
At the same time as copying it I wanted to add some flavor. Being the inventive sort that I am I Googled "Salmon Mi Cuit" and came up on this recipe.
In reading this article one of the things I remembered from Douglas was that salmon could develop some ugly looking albumen leakage. Which is unpleasant to consider, let alone eat. So I made a brine of 10% salt by adding 100g of salt to 1L of tap water. I left the skin on one piece for comparison purposes. I also left some skin on the salmon for want of better knife skillz.
 After a little bit of finesse I cleaned it up a bit into:

That's my super sweet Yanagi (japanese fish knife) underneath it. I carefully wash it and always dry it completely before putting it away, unfortunately you will notice the tip is slightly broken off and it has some staining (rust?) which is just one of the perils of roommate living. If anyone knows how to take better care of this I would appreciate the info.
At this point I realize I had to infuse the oil by cooking it on the stove for 30 minutes. So I put the salmon back in the fridge and mix up the infused oils.
Here is my mise en place (I don't know why that squash is in the picture either):
 That vanilla bean looks delicious so here is a close up:
 I actually only used half the bean and 1/3rd the other ingredients. I only needed 2 tbsp for these fillets and 1/3rd the recipe still yields 6.8 tbsp of infused oil. I was feeling awesome so I decided to make the infused oil by heating it in a water bath @ 55.5C for 35 Minutes. In order to do this I filled a ziplock with half a bean, split and scraped along with the other seasonings.
I zipped all but a little bit of the seal and submerged it in water to push most of the air out and then zipped it fully. I employed a complicated retaining mechanism, aka a wire basket with a plastic doohickey wedged in to counteract not all the air getting out and expanding to make it float:
 I then blended the basil (fresh from my little herb garden), parsley and olive oil in this mini food processor gadget that came with my immersion blender:

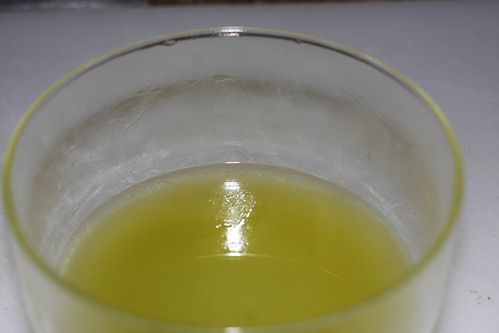
A little straining later and I end up with this semi-opaque oil:

Now it was time to start cooking the taters, russets I believe:
 The recipe says to boil these whole for 15 minutes or as long as it takes for them to soften, and then peel them. Of course this did not work at all and after 15 minutes and I ended up quartering these to cook them faster.
When they were cooked I just pulled the skins off, I left them on to add that little bit of extra flavor, you can see below how easily the skins were to remove before mashing (or left on if you want):

I was left with the skins, which I would normally put in a compost pile. However, I have never actually owned a compost pile so I was going to throw them away. Instead I fed them to mydog roommates.
I added some butter and and 1/3rd of a cup of milk and mashed my little heart out until I was left with a smooth puree. I let this sit on low while I completed the recipe and added the basil oil before mixing one last time and serving it.
I then took my oil filled bags out of the freezer, I was concerned they wouldn't have frozen but was greeted by opaque oil so I was all set:

Ok, that shot looks pretty gross, but that's what you should look for, add the brined fillet and vacuum seal. I set mine to high vacuum and moist contents to get it out quickly before the oil melted and to get a good seal just in case some did get sucked out. I was left with this delicious looking salmon:

I cooked it for 14 minutes @ 40C as per the WSJ article.
I then cubed some yellow summer squash and sauteed it for a hot second in some olive oil.
While that was sauteing that I crisped the skin with my trusty little blowtorch. This will probably be replaced by a new torch soon but it did the job nicely here:

Now with 100% less flash:

I plated the entire dish and drizzled some basil oil on the mashed potatoes and squash. It looked pretty delicious.
The texture was really out of this world and the taste was just right, I am glad I put in a little bit extra vanilla but it may have been helpful to crack or coarsely grind the pepper because not a lot of that flavor made it through to the salmon. This was almost the texture of gravlax or smoked salmon but more tender with an exquisite mouth feel, and yes it was that very vivid color, it seems that sous vide often has the nice effect of setting the color pleasantly.

And:

With the crisped skin, also delicious (but I am not really a big fan of fish skin in general):

So I decided to copy that but cook it sous vide by taking hints from Nathan and Douglas.
I headed over to Whole Foods for the salmon as well as the vanilla beans and herbs. I got two fillets of coho salmon from WF, not sure if they were wild or not but it was the most expensive at ~$16/lb so lets pretend it was. mmmm kay? In any case the fish looked delicious for a Sunday night with no smell and, I later found out, fresh taste. I
A fun fact to mention is that salmon has all sorts of parasites and germs that you may want to kill via freezing for 24 hours. That being said I usually eat it raw and do not pay much attention to the food safety aspect. If you are making this for immune compromised people, you probably should. More information can be read on Douglas' site.
At the same time as copying it I wanted to add some flavor. Being the inventive sort that I am I Googled "Salmon Mi Cuit" and came up on this recipe.
In reading this article one of the things I remembered from Douglas was that salmon could develop some ugly looking albumen leakage. Which is unpleasant to consider, let alone eat. So I made a brine of 10% salt by adding 100g of salt to 1L of tap water. I left the skin on one piece for comparison purposes. I also left some skin on the salmon for want of better knife skillz.
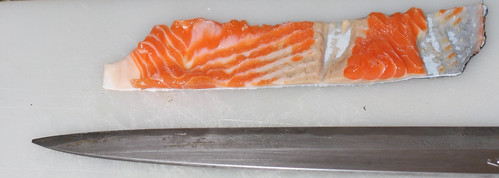 After a little bit of finesse I cleaned it up a bit into:
That's my super sweet Yanagi (japanese fish knife) underneath it. I carefully wash it and always dry it completely before putting it away, unfortunately you will notice the tip is slightly broken off and it has some staining (rust?) which is just one of the perils of roommate living. If anyone knows how to take better care of this I would appreciate the info.
At this point I realize I had to infuse the oil by cooking it on the stove for 30 minutes. So I put the salmon back in the fridge and mix up the infused oils.
Here is my mise en place (I don't know why that squash is in the picture either):
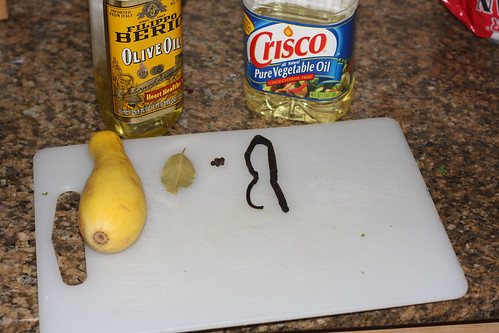 That vanilla bean looks delicious so here is a close up:
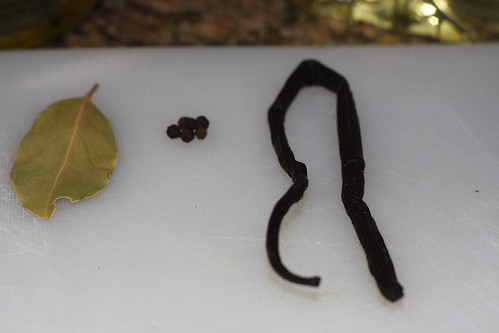 I actually only used half the bean and 1/3rd the other ingredients. I only needed 2 tbsp for these fillets and 1/3rd the recipe still yields 6.8 tbsp of infused oil. I was feeling awesome so I decided to make the infused oil by heating it in a water bath @ 55.5C for 35 Minutes. In order to do this I filled a ziplock with half a bean, split and scraped along with the other seasonings.
I zipped all but a little bit of the seal and submerged it in water to push most of the air out and then zipped it fully. I employed a complicated retaining mechanism, aka a wire basket with a plastic doohickey wedged in to counteract not all the air getting out and expanding to make it float:
 I then blended the basil (fresh from my little herb garden), parsley and olive oil in this mini food processor gadget that came with my immersion blender: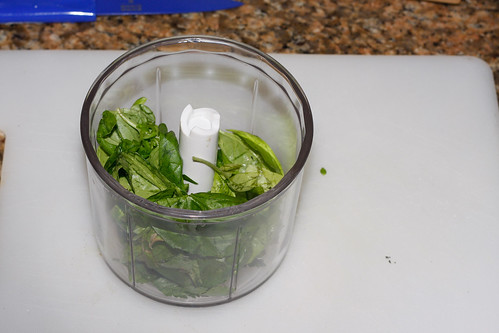
A little straining later and I end up with this semi-opaque oil:
Now it was time to start cooking the taters, russets I believe:
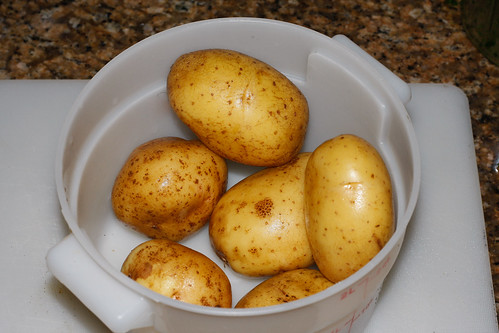 The recipe says to boil these whole for 15 minutes or as long as it takes for them to soften, and then peel them. Of course this did not work at all and after 15 minutes and I ended up quartering these to cook them faster.
When they were cooked I just pulled the skins off, I left them on to add that little bit of extra flavor, you can see below how easily the skins were to remove before mashing (or left on if you want):
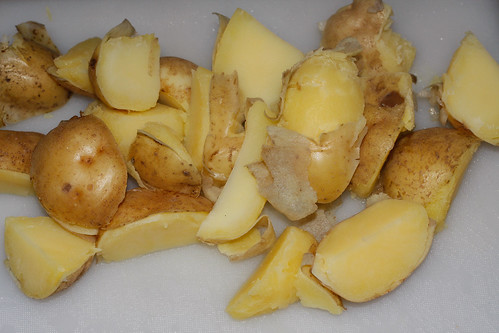
I was left with the skins, which I would normally put in a compost pile. However, I have never actually owned a compost pile so I was going to throw them away. Instead I fed them to my
I added some butter and and 1/3rd of a cup of milk and mashed my little heart out until I was left with a smooth puree. I let this sit on low while I completed the recipe and added the basil oil before mixing one last time and serving it.
I then took my oil filled bags out of the freezer, I was concerned they wouldn't have frozen but was greeted by opaque oil so I was all set:
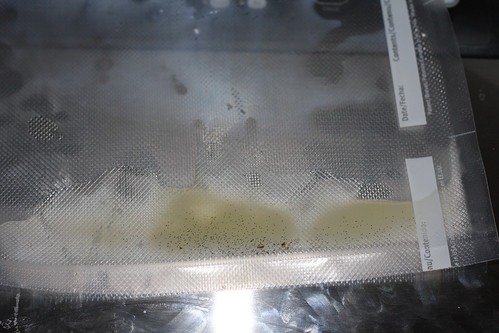
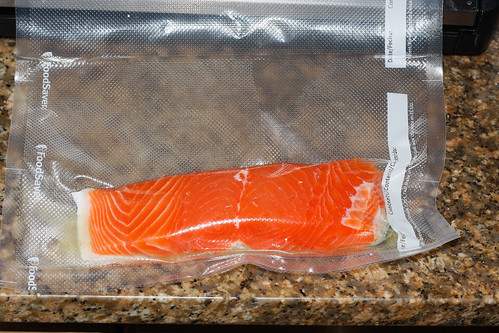
Ok, that shot looks pretty gross, but that's what you should look for, add the brined fillet and vacuum seal. I set mine to high vacuum and moist contents to get it out quickly before the oil melted and to get a good seal just in case some did get sucked out. I was left with this delicious looking salmon:
I cooked it for 14 minutes @ 40C as per the WSJ article.
I then cubed some yellow summer squash and sauteed it for a hot second in some olive oil.
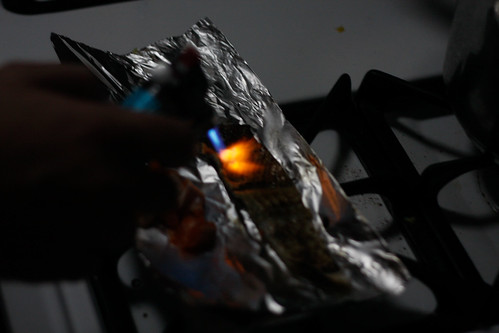
While that was sauteing that I crisped the skin with my trusty little blowtorch. This will probably be replaced by a new torch soon but it did the job nicely here:

Now with 100% less flash:
I plated the entire dish and drizzled some basil oil on the mashed potatoes and squash. It looked pretty delicious.
The texture was really out of this world and the taste was just right, I am glad I put in a little bit extra vanilla but it may have been helpful to crack or coarsely grind the pepper because not a lot of that flavor made it through to the salmon. This was almost the texture of gravlax or smoked salmon but more tender with an exquisite mouth feel, and yes it was that very vivid color, it seems that sous vide often has the nice effect of setting the color pleasantly.
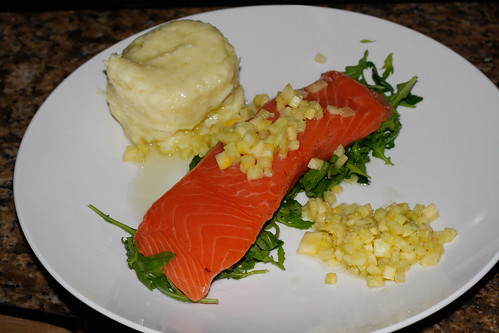
And:
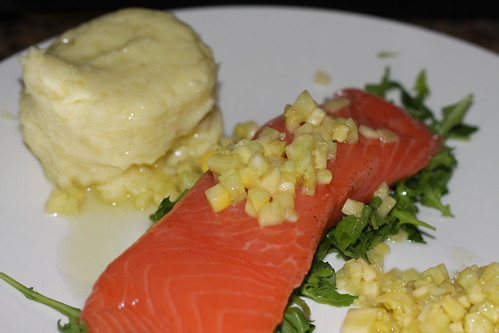
With the crisped skin, also delicious (but I am not really a big fan of fish skin in general):
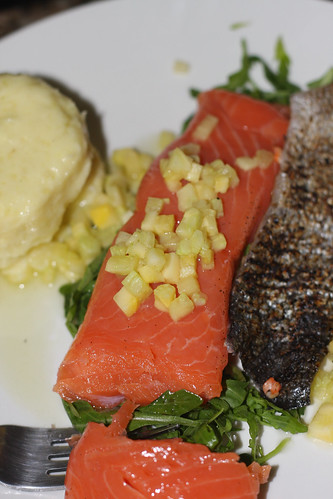
Friday, September 12, 2008
Meet The Tech
Ok so this is going to be the list of essential equipment that I will be using for this grand experiment of mine. The basic list for sous vide goes something like this:
Vacuum Sealer
Hot Water
I know, I know, you are saying to yourself - "Kevin, this is impossible! I knew I was right to denounce this whole sous vide thing, there is no way I can attempt this!"
Or not.
This is not rocket science (but you can certainly make it so if you wish, just check out NathanM's posts on eGullet) but you actually do need one more thing. The ability to regulate the temperature of that hot water. Unfortunately precise temperature regulation can be difficult to achieve and as with most things in life the harder it is, the more expensive.
I am a 26 year old living in Manhattan spending money on things 26 year olds in NYC spend money on so it is important to me to do this as cheaply as possible while not degrading the final product. I have an excellent job that I love doing, but rolling in dough I am not. Hopefully I can do this inexpensively enough that most anyone can follow this blog / book and cook it at home as I do.
I first started my adventures in sous vide with just my FoodSaver V2840 and a large pot of water on the stove with a candy thermometer on it.
This method works great for tender proteins (steak, pork, chicken) that require cooking times of 2 hours or less. It is not so great (due to the necessary careful watching of said pot) for cooking short ribs for 36+ hours.
But I am getting ahead of myself. Lets cover the vacuum portion of this first.
Vacuums
You have many options for vacuum sealing your food and the option you pick is going to be dependent on several things:
a) Your level of commitment
b) Your level of income.
You can do something as simple as sucking the air out of a ziploc bag with a straw to get a tight seal or as complex as a $15,000 high speed dual chamber vacuum sealer. The choice is up to you.
I went with the food saver and have been very pleased with it so far, it ran me about $110 on sale at amazon (please note that none of my links are affiliate links and I encourage you to shop around to find the best deal).
The things to think about in a vacuum sealer are:
A Reynolds Handi Vac:

A (my) edge sealer/out of chamber anvil machine:

A chamber machine:

Contrary to popular (or maybe just my) belief, the amount of vacuum a machine can pull isn't really a concern unless you want to do things like compress fruits or cook via compression (more on this in a later post). The most important thing is that it gets most of the air out; this is required to halt oxidation. Additionally, if there is too much air in the bag it will float and cause uneven heating.
So for 90% of sous vide recipes a Reynolds handivac is the same as a foodsaver.
Basically.
The challenge is when you want to do recipes with a marinade or other liquid.
One possible solution is to freeze the marinade first. Something to note is that things like sugar and salt lower the freezing point of liquids. If you have a wimpy freezer this means some of your marinades may not freeze. I prefer to freeze the liquid marinade into cubes without the sugar and salt. Then you can put the sugar/salt into the bottom of the vacuum bag, add the food as a barrier to keep the sugar/salt from getting sucked out, and then add the marinade cubes.
If you are lucky enough (or just rich enough) to afford a chamber vacuum then this isn't a concern for you and you can vacuum pack anything from short ribs to stocks; color me jealous.
If you are not rich and just starting out, I would recommend the handivac route. Splurge on a decent food saver for vacuum sealing if you want to dive in head first, or think you will use it for actually saving food.
Water Temperature Regulation
Ok so now hopefully you have some idea of how you are going to be sealing the delicious flavors in and the nasty oxygen out.
So lets talk about actually cooking with this. Sous vide is traditionally thought of as "boil in a bag" cuisine and as such has a, ahem, low-brow, connotation to it. Nothing could be further from the truth of course but the basic idea of boiling in the bag is correct. So long as you replace "boil" with "gently simmer".
You could technically cook something sous vide in a regular oven providing you can obtain precise temperature control but, frankly, air is a crappy conductor of heat.
Now if you want to cook with the big boys and girls you need to move on to an advanced medium. That's right, di-hydrogen monoxide. Often the subject of clever pranksters it's more commonly known as water. You can get fancy and use a CVap (with or without the vacuum bag, of course without wouldn't be sous vide) or you can go the commoner route and just use hot water.
I, of course, went the route of the noble but struggling proletariat and opted for the hot water. At first I used a very simple mechanism:

Combined with:

These two tools combined make for an excellent beginner sous vide setup, with a small bit of practice.
I was able to cook some of the best steak and pork I have ever made in my (albeit short) cooking life.
Once you get bitten by this bug however you will probably want to experiment with more precise temperature control for longer periods. Some things (like eggs) need a very precise temperature and small variations result in large differences. A great example of this is on Douglas Baldwins amazing "Practical Guide To Sous Vide" (There used to be pictures of the eggs right on the site but they are definitely in the PDF version, worth looking at). A difference of two degrees F can make a lot of difference in the final product.
Once you decide to move up from the pot and thermometer you have three options:
1) An Immersion Circulator (mine):

2) A circulating water bath:

3) Rice Cooker (or crockpot) and a PID temperature controller:

One - My choice was the immersion circulator, depending on how lucky you are this can be the cheapest to get. I watched E-Bay for a while and ended up getting one for the low low price of $130 shipped. Now that being said. This was the original condition:

You may say to yourself "Self, that don't look half bad".
You would be wrong.
You would be very, very, very, very wrong.
Seriously.
This bad boy was NasT with a capital T.
There was some sort of dried film over the entire bath and circulator portions. Besides that this thing is awesome. It's making me 36 hour short ribs right now and it is very quiet and has not deviated even .1 from 55C.
So this is what I did (and you should do) to clean it. I soaked it in very hot tap water, and scrubbed off all the grime I could. I then filled it with water and put it on boil.
Let it sit there for as long as you want. Make sure to cover it with a specialized steam containment cover:
 So that is a bit wrinkly because the cover is well used by this point. At some point I am going to have to splurge and make myself another one. There goes another penny! But seriously, you can use whatever you want, you can buy fancy ping pong balls or you can use aluminum foil. Whatever's clever. Oh and that pic is at 55.0 because it is already cleaned and is now cooking delicious short ribs.
Ok so the water is boiling, awesome. now dump it out, and fill it back up with warm water. Add enough bleach to make a sterilizing solution (call me paranoid but I used double the bleach as recommended). Let it sit for 2+ hours. Then dump it out
rinse well (be careful to keep the upper house dry if using an IC) and fill with water, let it boil again, scrub again, rinse again.

Then get your self some Citranox, described in this thread as one of the strongest acid cleaners you can reasonably obtain. This is a bit expensive. I ordered it from amazon and it wound up running me a less then 50 dollars. Now I have a bunch so I guess I can sterilize more things?
Then boil, rinse, scrub, rinse and you are done!
Does that seem hard? It may be, I dunno I spoke briefly to a really smart scientist girl I know and she said it sounded about right so, it's got that ringing endorsement.
If you do this, fully expect to get ebola and die from your IC. I take no responsibility for this regimen to actually do anything besides make it shinier under certain conditions and moonphases, neither of which can actually occur together.
So basically use at your own risk, please don't rely on me for sanitation advice, I play with computers all day.
Two - Ok so you can also get a water bath. This thread (again, for the slow ones) is very helpful, I imagine the cleaning is relatively similar. In fact some water baths have a removable IC, that was how mine was sold. (Lauda MA6 with Type B Circulator) so it really is very similar. If you do not know how to operate your IC/WB then maybe the following picture may help you:

Keep in mind that the display is the current temp, when you press the button it becomes the desired temp. There is a small switch on the knob. This locks the knob and prevents accidental changes (which are already unlikely because you need to press the button at the same time), the knob is very sensitive on mine so it may take a bit for you to get used to it.
Three - Rice cookers / crock pots and PID Temperature Control Units.
Ok so technically it doesn't have to be a PID, it could be a simple on/off switch (the cool kids call this a "bang-bang" switch). According to Douglas Baldwin an on/off switch leads to fluctuations of ±2.1°F (±1.2°C) and the PID is only ±0.7°F (±0.4°C). Keep in mind an IC is only ±0.1°C. So ±1.2°C may be a deal breaker for some recipes. It's your call.
Using these are very easy and you just plug the pot into the back of the unit and put the probe into the pot (at least with the auber type units anyway):
 So the main advantage here is cost its the cheapest (1-200) unless you get lucky with an IC. That being said it's just not that hard to "get lucky" (well in this case anyway!). The other advantage is that you know this stuff is all new and clean and you don't have to spend money on Citranox and other nasty chemicals.
Decisions, Decisions.
Well that just about wraps up this Meet The Tech post expect more as time goes on. I hope this is helpful to people trying to get into sous vide cooking.
Vacuum Sealer
Hot Water
I know, I know, you are saying to yourself - "Kevin, this is impossible! I knew I was right to denounce this whole sous vide thing, there is no way I can attempt this!"
Or not.
This is not rocket science (but you can certainly make it so if you wish, just check out NathanM's posts on eGullet) but you actually do need one more thing. The ability to regulate the temperature of that hot water. Unfortunately precise temperature regulation can be difficult to achieve and as with most things in life the harder it is, the more expensive.
I am a 26 year old living in Manhattan spending money on things 26 year olds in NYC spend money on so it is important to me to do this as cheaply as possible while not degrading the final product. I have an excellent job that I love doing, but rolling in dough I am not. Hopefully I can do this inexpensively enough that most anyone can follow this blog / book and cook it at home as I do.
I first started my adventures in sous vide with just my FoodSaver V2840 and a large pot of water on the stove with a candy thermometer on it.
This method works great for tender proteins (steak, pork, chicken) that require cooking times of 2 hours or less. It is not so great (due to the necessary careful watching of said pot) for cooking short ribs for 36+ hours.
But I am getting ahead of myself. Lets cover the vacuum portion of this first.
Vacuums
You have many options for vacuum sealing your food and the option you pick is going to be dependent on several things:
a) Your level of commitment
b) Your level of income.
You can do something as simple as sucking the air out of a ziploc bag with a straw to get a tight seal or as complex as a $15,000 high speed dual chamber vacuum sealer. The choice is up to you.
I went with the food saver and have been very pleased with it so far, it ran me about $110 on sale at amazon (please note that none of my links are affiliate links and I encourage you to shop around to find the best deal).
The things to think about in a vacuum sealer are:
- Is it a chamber or an "anvil out of chamber" / edge sealing type machine? If it is not a chamber vac it will be much more difficult to work with liquids but I hope to show several ways you can work around this in future posts.
- How strong is the vacuum (only important if you are looking to compress cook fruit/veggies)?
- How easy is it to get the bags and how expensive are they? (edge bags can cost 4 times as much as a comparable sized chamber bag)
- How hot can the bags get? I believe I read somewhere that the Reynolds handivac bags have a max temp of ~180F/82.2C. No one likes duck confit w/ plastic leaching surprise.
A Reynolds Handi Vac:
A (my) edge sealer/out of chamber anvil machine:
Contrary to popular (or maybe just my) belief, the amount of vacuum a machine can pull isn't really a concern unless you want to do things like compress fruits or cook via compression (more on this in a later post). The most important thing is that it gets most of the air out; this is required to halt oxidation. Additionally, if there is too much air in the bag it will float and cause uneven heating.
So for 90% of sous vide recipes a Reynolds handivac is the same as a foodsaver.
Basically.
The challenge is when you want to do recipes with a marinade or other liquid.
One possible solution is to freeze the marinade first. Something to note is that things like sugar and salt lower the freezing point of liquids. If you have a wimpy freezer this means some of your marinades may not freeze. I prefer to freeze the liquid marinade into cubes without the sugar and salt. Then you can put the sugar/salt into the bottom of the vacuum bag, add the food as a barrier to keep the sugar/salt from getting sucked out, and then add the marinade cubes.
If you are lucky enough (or just rich enough) to afford a chamber vacuum then this isn't a concern for you and you can vacuum pack anything from short ribs to stocks; color me jealous.
If you are not rich and just starting out, I would recommend the handivac route. Splurge on a decent food saver for vacuum sealing if you want to dive in head first, or think you will use it for actually saving food.
Water Temperature Regulation
Ok so now hopefully you have some idea of how you are going to be sealing the delicious flavors in and the nasty oxygen out.
So lets talk about actually cooking with this. Sous vide is traditionally thought of as "boil in a bag" cuisine and as such has a, ahem, low-brow, connotation to it. Nothing could be further from the truth of course but the basic idea of boiling in the bag is correct. So long as you replace "boil" with "gently simmer".
You could technically cook something sous vide in a regular oven providing you can obtain precise temperature control but, frankly, air is a crappy conductor of heat.
Now if you want to cook with the big boys and girls you need to move on to an advanced medium. That's right, di-hydrogen monoxide. Often the subject of clever pranksters it's more commonly known as water. You can get fancy and use a CVap (with or without the vacuum bag, of course without wouldn't be sous vide) or you can go the commoner route and just use hot water.
I, of course, went the route of the noble but struggling proletariat and opted for the hot water. At first I used a very simple mechanism:
Combined with:

These two tools combined make for an excellent beginner sous vide setup, with a small bit of practice.
I was able to cook some of the best steak and pork I have ever made in my (albeit short) cooking life.
Once you get bitten by this bug however you will probably want to experiment with more precise temperature control for longer periods. Some things (like eggs) need a very precise temperature and small variations result in large differences. A great example of this is on Douglas Baldwins amazing "Practical Guide To Sous Vide" (There used to be pictures of the eggs right on the site but they are definitely in the PDF version, worth looking at). A difference of two degrees F can make a lot of difference in the final product.
Once you decide to move up from the pot and thermometer you have three options:
1) An Immersion Circulator (mine):

2) A circulating water bath:
3) Rice Cooker (or crockpot) and a PID temperature controller:
One - My choice was the immersion circulator, depending on how lucky you are this can be the cheapest to get. I watched E-Bay for a while and ended up getting one for the low low price of $130 shipped. Now that being said. This was the original condition:
You may say to yourself "Self, that don't look half bad".
You would be wrong.
You would be very, very, very, very wrong.
Seriously.
This bad boy was NasT with a capital T.
There was some sort of dried film over the entire bath and circulator portions. Besides that this thing is awesome. It's making me 36 hour short ribs right now and it is very quiet and has not deviated even .1 from 55C.
So this is what I did (and you should do) to clean it. I soaked it in very hot tap water, and scrubbed off all the grime I could. I then filled it with water and put it on boil.
Let it sit there for as long as you want. Make sure to cover it with a specialized steam containment cover:
 So that is a bit wrinkly because the cover is well used by this point. At some point I am going to have to splurge and make myself another one. There goes another penny! But seriously, you can use whatever you want, you can buy fancy ping pong balls or you can use aluminum foil. Whatever's clever. Oh and that pic is at 55.0 because it is already cleaned and is now cooking delicious short ribs.
Ok so the water is boiling, awesome. now dump it out, and fill it back up with warm water. Add enough bleach to make a sterilizing solution (call me paranoid but I used double the bleach as recommended). Let it sit for 2+ hours. Then dump it out
rinse well (be careful to keep the upper house dry if using an IC) and fill with water, let it boil again, scrub again, rinse again.

Then get your self some Citranox, described in this thread as one of the strongest acid cleaners you can reasonably obtain. This is a bit expensive. I ordered it from amazon and it wound up running me a less then 50 dollars. Now I have a bunch so I guess I can sterilize more things?
Then boil, rinse, scrub, rinse and you are done!
Does that seem hard? It may be, I dunno I spoke briefly to a really smart scientist girl I know and she said it sounded about right so, it's got that ringing endorsement.
If you do this, fully expect to get ebola and die from your IC. I take no responsibility for this regimen to actually do anything besides make it shinier under certain conditions and moonphases, neither of which can actually occur together.
So basically use at your own risk, please don't rely on me for sanitation advice, I play with computers all day.
Two - Ok so you can also get a water bath. This thread (again, for the slow ones) is very helpful, I imagine the cleaning is relatively similar. In fact some water baths have a removable IC, that was how mine was sold. (Lauda MA6 with Type B Circulator) so it really is very similar. If you do not know how to operate your IC/WB then maybe the following picture may help you:

Keep in mind that the display is the current temp, when you press the button it becomes the desired temp. There is a small switch on the knob. This locks the knob and prevents accidental changes (which are already unlikely because you need to press the button at the same time), the knob is very sensitive on mine so it may take a bit for you to get used to it.
Three - Rice cookers / crock pots and PID Temperature Control Units.
Ok so technically it doesn't have to be a PID, it could be a simple on/off switch (the cool kids call this a "bang-bang" switch). According to Douglas Baldwin an on/off switch leads to fluctuations of ±2.1°F (±1.2°C) and the PID is only ±0.7°F (±0.4°C). Keep in mind an IC is only ±0.1°C. So ±1.2°C may be a deal breaker for some recipes. It's your call.
Using these are very easy and you just plug the pot into the back of the unit and put the probe into the pot (at least with the auber type units anyway):
 So the main advantage here is cost its the cheapest (1-200) unless you get lucky with an IC. That being said it's just not that hard to "get lucky" (well in this case anyway!). The other advantage is that you know this stuff is all new and clean and you don't have to spend money on Citranox and other nasty chemicals.
Decisions, Decisions.
Well that just about wraps up this Meet The Tech post expect more as time goes on. I hope this is helpful to people trying to get into sous vide cooking.
Subscribe to:
Posts (Atom)

 Posts
Posts

