Of course it had to involve sous vide in some way, and the cookbook is helpfully arranged into seasons so I just thumbed through the Autumn section until I got to this one:
This is Pheasant, Shallot, Cider, and Burning Oak Leaves.
I debated whether or not to include the photo for a couple reasons.
The first is that it I am sure that it is copyrighted and I don't know how the folks over there feel about that. I ended up taking a screen grab (and hosting it myself, hot linking is bad mmmkay) from the Aroma section of the Mosaic Website and gave credit to them; also clicking on the image brings you to the appropriate page. If someone in the know has an issue just let me know and I will remove it ASAP.
The second is that it sets high expectations but sometimes its important to be brutally honest. I think overall I was happy with how this worked out so its not really a problem, I will try to include comparison shots in this blog where possible.
So as for this recipe: it looked relatively straightforward and did not have an intimidating amount of components which is more then I can say for the majority of dishes in this tome so I decided to start with this.
The first component was what I thought would be the easiest one, roasted shallots. I grabbed some shallots from the supermarket and I have to admit that I am ignorant as to the varieties of shallots and just hope that the shallots I grabbed are the gray shallots prescribed in the recipe. Their skins are gray so I hope that is the case.
Another thing I was not sure of was when they said "shallots" do they mean both offsets in those shallots that are more then just one? I assumed it was a matter of one root = one shallot regardless of offsets.
Then I tossed them with some grapeseed oil. This oil was a nice shade of green, something I was previously unaware of:
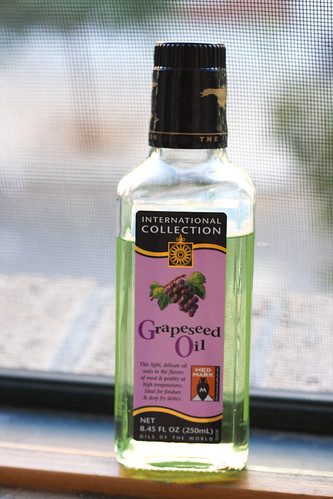
Yeah, no clue grapeseed oil was green. I told you I wasn't an experienced cook and that was no lie.
So I tossed them in the oil and added some kosher salt and they ended up looking like this:
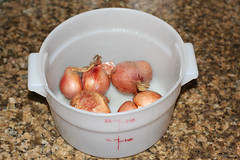
I know pretttttttty exciting right? Thrilling. These got roasted for an hour but to be honest it seemed like they were too soft and I had issues assembling the skewers in the end. The looked like this, after I cut them in half, it was a bit too difficult to try and cube these up neatly:
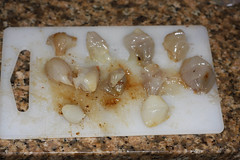 I covered those bad boys up with some plastic wrap and stashed them in the fridge for the final assembling.
Next it was on to the Cider Gel. Here is my Mise En Place for this minus some kosher salt, I'm learning people, bear with me.
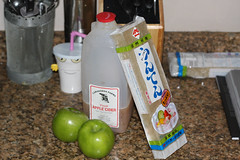 That thing standing up is agar-agar, you will note that it is all in Japanese and I speak no Japanese but the clerk pointed it out so I was probably good to go but wanted to make sure.
I had no way to verify this as it appeared this package was entirely in Japanese. Luckily the back had the ingredients list, in English on a sticker, which included agar-agar (I love saying this) and called it Kanten which I recalled from a little wikipedia love as the Japanese word for agar-agar, they also called "seaweed powdered stick" but I digress.
Anyway that, some apples, some cider from the farmers market,
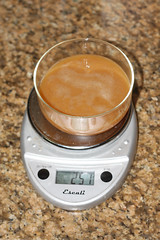 salt and agar-agar into a sauce pan and heated this till simmering and the agar was dissolved and the apples were soft.
 These ended up smelling delicious and it tasted pretty delicious as well.
I poured this into a loaf pan lined with plastic wrap, it turned out that the loaf pan was slightly too large but not by much so it turned out pretty well.
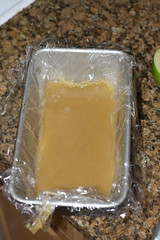 Once this set I cut it up into cubes:
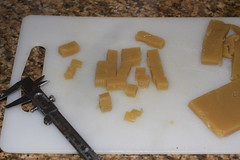 Yeah I use calipers in my kitchen, yeah I am a dork :(
I then put these on a small plate and covered them with a moist paper towel and put these in the fridge as well.
I will say two things.
First, these were a lot softer then I anticipated but I followed the recipe exactly so it must just be the way it is.
And two, granny smith apples are not to be trifled with, those bad boys did this to my crappy vegetable peeler:
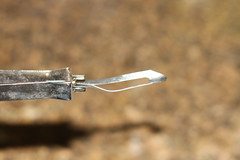
woops.
Alright so that was super exciting right? Yeah, totally.
Now it's on to the really fun part, the pheasant. I picked this bad boy up on the internets. I got the fresh and non-wild variety stupidly thinking that fresh farmed beats frozen wild, it basically tasted like chicken, albeit 15USD$/lb chicken (shipped), so I am not assuming this is not the case, lesson learned.
First things first I have never disassembled a raw bird (yes I am a novice).
Luckily Mike Pardus just posted a great video over at A Hunger Artist which is a sweet blog I found from Michael Ruhlman's blog who of course helped write The French Laundry Cookbook which is really the reason (along with the TFL at Home Blog of course) that I started this blog, so we come full circle.
Anyway by following that video, I was able turn this:
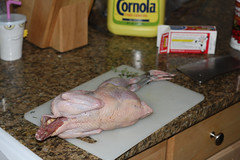 Into this:
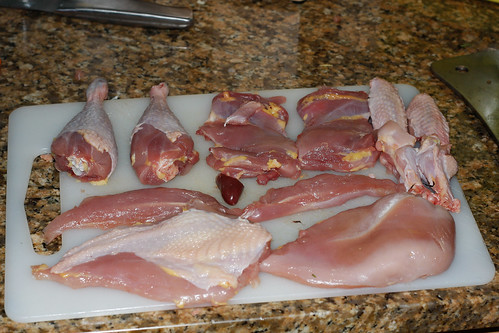 Counter clockwise from the top left that is: Drumsticks, boneless thigh meat, disassembled wings breast halves, one with skin, two chicken "tender loins" and the heart.
This was after I totally disassembled the bird using Pardus' method and put the carcass and bone into a stock pot and the skin and fat into a rendering pot. So these are all trimmed, I only left the skin on one breast half because I only needed one for the recipe
(that calls for a breast w/ skin, duh) and I'm trying to maintain my girlish figure.
Here is a gratuitous stock shot:
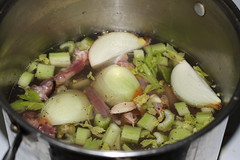 I cooked it about 3 hours so it was really some bastard susbtance midway between jus and stock, according to my friend Jacob anyway.
I was pretty darn proud of my leet skillz but some things worked out better then others. As evidenced below:
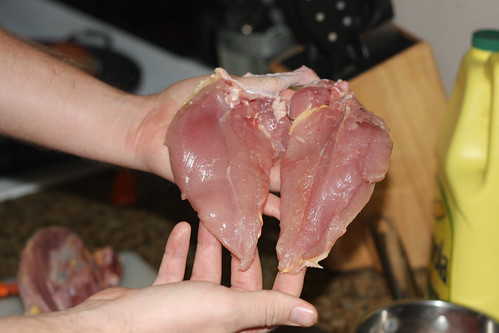
The one on the left looks awesome and the one on the right looks pathetic. Overall however this was easier then I imagined and will definitely be buying whole chickens to carve up. Thanks to my awesome food saver I can buy a bunch of chickens, break them down, season and bag them and it makes for a really quick and easy meal. Plus I can make a lot of stock at once and I save the rendered fat for various cooking uses, mostly because I like saying I render my own chicken fat.
When you render this you get:
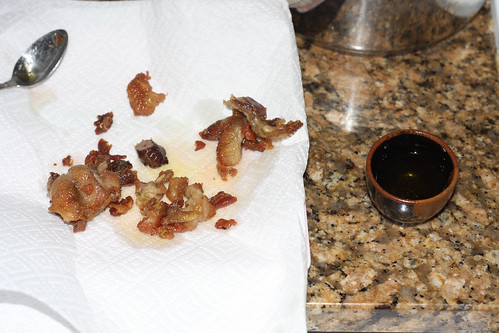
On the left you have pheasant cracklings and on the right, in a lovely sake glass I got in Tokyo, liquid chicken fat (actually got two glasses worth from this one bird). I made this yesterday and used some of the fat and the cracklings in an omelet I made for dinner tonight and they tasted delicious.
When I first made it I called it pheasant bacon and fed it to my ravenous roommates who seemed to enjoy it. Oh, also after the water all evaporated and I was left with just fat in the rendering pot I dropped the heart in and ate it for a delicious mid prep snack.
Anyway, I packaged up the breasts with the herbs and some butter (way more butter then I would normally use when cooking a bird but then again there is a reason my name isn't synonymous with "awesome chef"). I also got nervous at this point and thought that "pheasant breast" may mean "both halves" so I threw in both along with the tenderloins which mostly separated on their own.

It looks delicious doesn't it? And here is the end result:

Yeah lots of butter. The good news, health wise anyway, is that most of that butter stays in the bag and not in and on the pheasant.
The extra pieces I tossed in another bag with salt, pepper and butter:
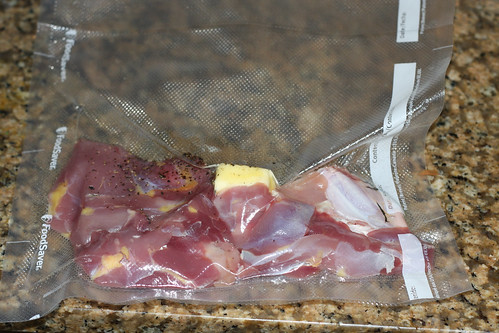 Which when combined with some left over Butternut Squash, Spinach and Blue Cheese Risotto and a quick mustard sauce become this dinner:
 It doesn't look very delicious but trust me it was absolutely delicious and I will probably make this again soon.
So now it was time to put it all together. First I had to pare down the oak leaves and ended up with this:
 I don't think having to whittle down oak branches was one of those things I anticipated when I started this project but I am sure there will be lots more I never thought of.
One thing the astute reader will notice is that my leaves are a lovely green and the recipe clearly indicates they should be a lovely orange hue befitting the season. Unfortunately NYC leaves have not yet begun to turn so I was stuck with this.
I actually originally gathered (poached?) some leaves from Central Park and even got a couple of friends to bring them to me after I left them in the UWS before a night of partying, I then met them for lunch at Black Iron Burger and promptly left the leaves there. Luckily there was an oak tree I never noticed right outside my apartment so it all worked out.
The net result of this whittling were Oak branch skewers which were quite lovely and very difficult to work with:
 I heated up some oil and started making the tempura batter, after carefully weighing all my ingredients I ended up with this:
Not quite the light and airy tempura batter I was hoping for. I added a lot more seltzer water and ended up with what I thought was a passable batter. However the final product looked a bit more "corn dog" then "Alinea"
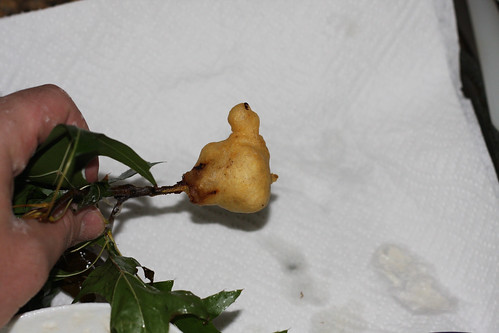
In the end though they tasted absolutely delicious. The cider gels liquefies when you fry it and when you bite in the pheasant, shallot and cider all meld together to become something truly special, more then the sum of its parts without a doubt.
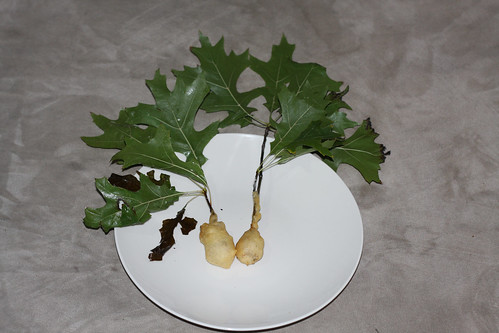
The darker leaves are ones that ended up in the frying oil and I didn't salt or pepper these yet as is called for in the book, the burning leaves definitely had a desired effect. I found THAT out when my roommate stumbled in yelling that it "smells like a goddamn forest in here" so that was pretty sweet.
Overall the end result looks very amateurish but I was very happy with the taste. The gel is a really awesome touch. If I were to make this again in the future I would probably do some work on getting the tempura batter just right as well making a proper sized dish for the cider gel to set up in because they were a bit thinner then called for.
Additionally I would try roasting the shallots for slightly less time because they had a bad habit of falling off the skewer when dipped in the batter (but that could also be a result of my less then airy batter).
I didn't invest in squid service pieces because this was just a filler recipe and I didn't think it was necessary to enjoy the final product. They are pretty neat though and may be cool to pick up and play around with in the future.
All in all this recipe definitely increased my resolve to snag a reservation at Alinea next time I am in town, which is hopefully soon.
Anyway my next post may be a Meet the Tech post or more likely will be the very first recipe from Under Pressure! I am very excited to really get this project underway and this first recipe was pleasantly challenging and I can't wait to try more new things.


4 comments:
Good job, Pooks! I admire your ambition in tackling such fussy recipes. I have even more admiration for your foraging of oak leaves and branches and actually whittling them!
I see Shakezula lurking among your mise en place...better make sure he doesn't mess stuff up, you know how he can get.
Fascinating stuff! I'm waiting eagerly for my copy of Under Pressure myself.
I'm really impressed with your filleting of the pheasant - that's darn neat work.
Do you mind if I link to your blog from http://www.kamikazecookery.com ?
cairmen - Of course! thank you for the compliment, please feel free to link to this blog however or wherever you like so long as it is not for commercial gain.
roopa- thanks snooks ;) we will see how this whole project turns out shortly I guess.
Wow, this post is incredible. I am in awe of your knife skills! Amazing..
Post a Comment